HAL Panel Reproduction
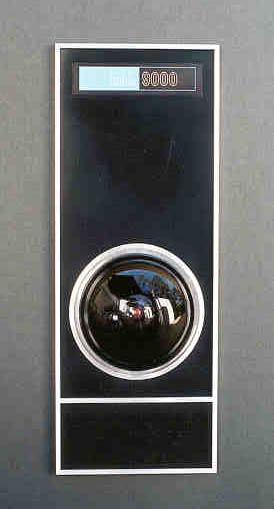
Only one HAL panel from the
film is known to survive. This is owned by a gentleman in the
UK along with the key used to open the HAL Brain Room door. Here
is a picture of the original HAL panel and the key.
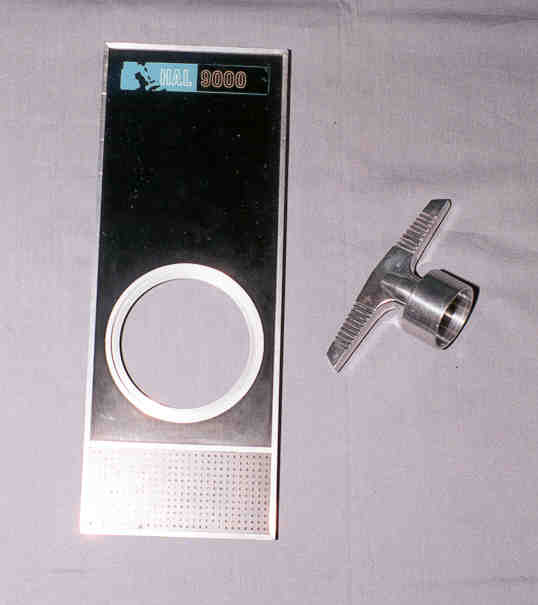
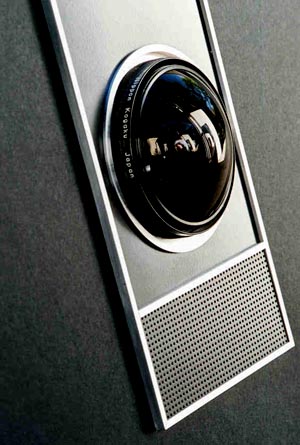
Note the lens is missing from
the panel. Otherwise the panel is complete. Unfortunately the
HAL logo has chipped over the years, but still this is a very
nice artifact. After all........this is HAL.
It should be noted this particular
panel has a slightly different aspect ratio from the HAL panels
seen in the final cut of the film. This difference has been questioned
by some, but there is no doubt it is an authentic panel. I should
point out there were other sizes of HAL panels used in the sets,
but never captured in the final cut of the film.
The original intent of this
project was to help the owner of the HAL panel determine what
optics were used for HAL's eye, and how it was attached. I measured
the original HAL panel and began researching the optics. I came
across an image on the 2001 Key Sheet transparencies which showed
a side view of the HAL panel. I was able to determine that an
actual photographic lens was used in the HAL panel. The printing
on the edge of the lens was out of the plane of focus, hence it
was blurry. However the overall shape of the printed characters,
size, and spacing could be determined. Using this info, I researched
lenses which were available at the time the sets were built. I
have found that the error most people make in getting a lens for
a reproduction HAL, is that they don't realize the lenses commercially
available today were not the same as when the film was made. There
have been several fisheye lenses, of the same focal length, made
by the same manufacturer, over the years. The important part is
finding the type that was actually used. Some individuals have
purchased what they thought was the correct lens, only to have
a lens that is substantially larger that the hole in the HAL panel.
Common sense (lens won't fit in the hole) and simply looking at
images of the HAL panel in the film clearly show that's the wrong
lens. The unfortunate part about that,is they are paying $2000
or more for the wrong lens. Also, since they are using an oversize
lens, they scale up the HAL panel to fit the lens, and end up
with a panel that's nearly 2 feet long, which is larger than the
original.
So with some simple research,
the correct lens was determined. Getting one was a little harder,
since they are considered "collector lenses" in the
photographic/camera community. Thus the price can top $1500 or
so.
Based on the shape of the rear
of the panel, and the size and location of holes on the rear surface,
I have an idea of how they mounted the lens. However I am still
investigating some specific details.
Based on the measurements I
made, I fabricated a panel using the same materials as the original.
The original, is metal machined to a fine finish and close tolerance.
I can not overemphasize it is very well made. No props these days
would be made as well as this. This presented a challenge for
me to make it as good as the original. It took many hours of measuring,
making tooling fixtures, and machining the metal to make the reproduction
panel, which is actually made of several parts, as was the original.
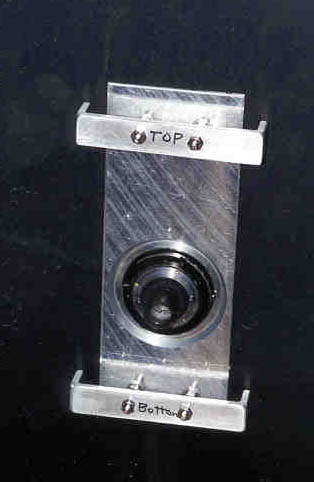
These images show initial machining
of the panel and turning the lens hole.
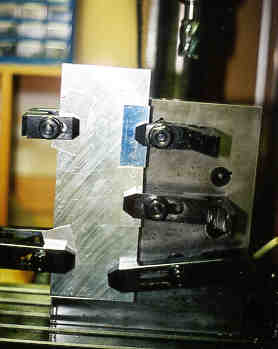 Trimming the panel edges.
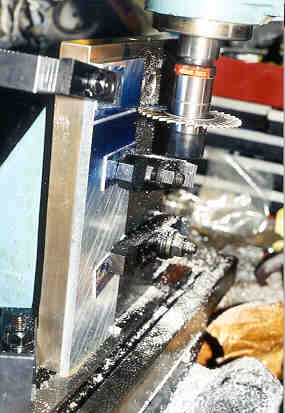 Slotting
the panel for the raised trim.
Slotting
the panel for the raised trim.
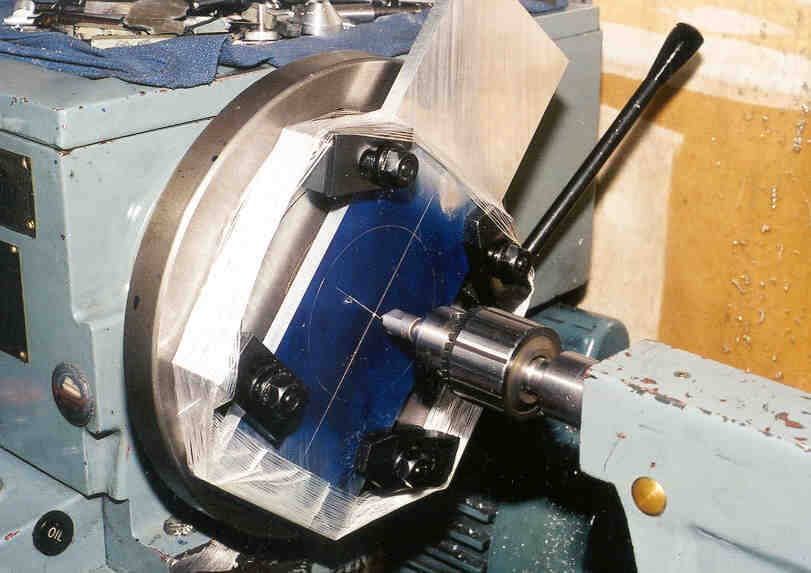
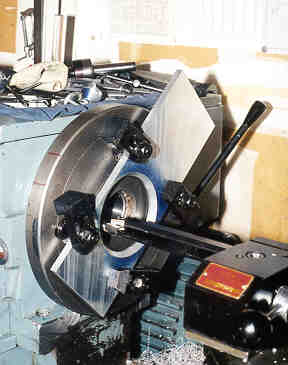
Boring the lens hole. The circular
bezel will fit into this hole.
While nearing competition of
the test panel, I was contacted by Cronkite-Ward Productions regarding
a 2001 documentary they were producing for the Discovery Channel.
They were looking for a HAL panel. I suggested they use the original,
but after some time they identified they needed one which had
an undamaged HAL logo decal. Since they said they were interested
in using the one I was working on, I hurriedly finished the reproduction
panel, installed a lens and sent it to them. Since I did not have
time to make the decal, they made a temporary sticker based on
the artwork I sent them. This artwork was from an original HAL
decal, which I corrected for registration errors and age discoloration.
This panel was used in the documentary (which I understand has
not aired as of this date).
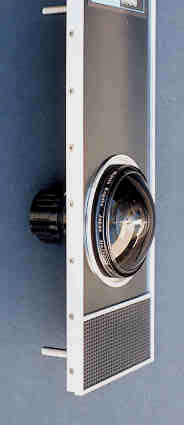
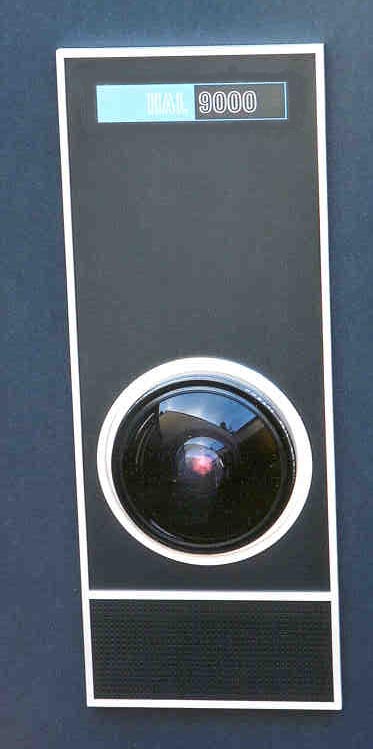
Here are some images of the
finished panel.
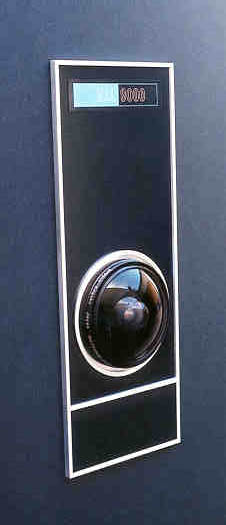
 <<Reproduction.............................. HAL Panel in
the Pod Bay>>
<<Reproduction.............................. HAL Panel in
the Pod Bay>>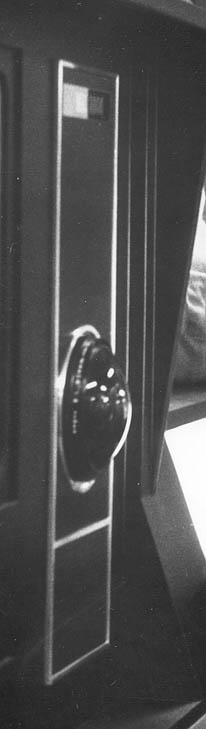
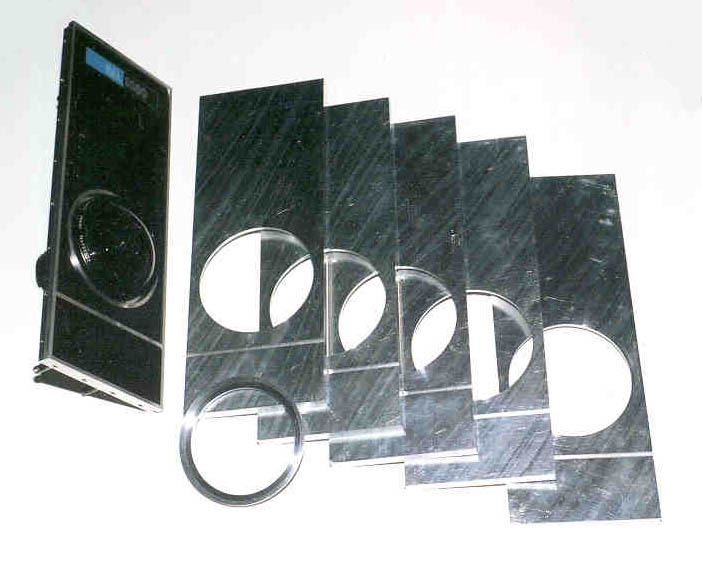
In doing this project I made
several panels. Since the setup for machining a part takes the
longest, it is easy to run multiple parts once everything is setup.
Also I wanted to have alternate parts in case a part was damaged
during the subsequent machining process. So I started with 6 panels.
I had no machining errors so all 6 panels turned out good. So
now I have 5 extra panels. Here are a couple of images of the
finished panel with the 5 extra panels.

My next step will be to replace
the temporary HAL logo with a decal, and install a light source.
The follow-on to this project will be to make the other sizes
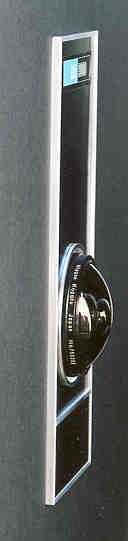
of HAL panels. One thing I noticed when I had machined the edges
of the panels, was how much the panel, without the lens hole,
resembled the monolith in dimensional ratio of width to height.
Was this intentional?......something to think about.
While looking for switches
for the full size pod project, at a salvage yard recently, I came
across a computer system panel. The panel appeared to be from
the 1960s and was made by Honeywell. As documented in Agel's book,
Honeywell provided extensive help to Kubrick with technical expertise,
and provided many switches. The first thing I noticed was the
logo artwork on the panel. The logo consisted of a hortzontal
rectangle, one part blue with white lettering, the other part
black with white lettering.
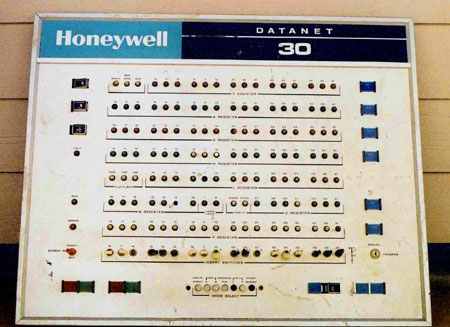
Could this be where
the colors of the HAL logo orginated?
Something else to think
about.
Back